How to Replace Rear Drum Brakes
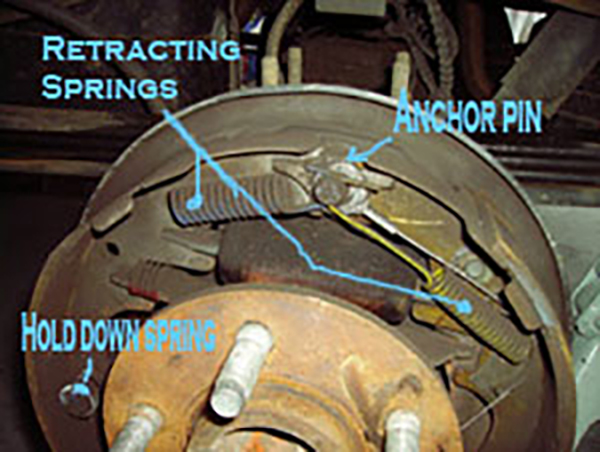
Most drum brakes are of similar design to the pictures on this page, but I recommend you take your own picture of the brake assembly you will be working on because it is easy to forget what goes where and how.
You will need a flat head screw driver, spring removal tool, needle nose and channel lock pliers.
Always change out brake shoes of both rear wheels. I recommend you also replace all the springs and retractor as the heat they are subject to over time will deteriorate their performance.
I suggest you wear some type of mask while working with brakes, some brakes contain asbestos which could be harmful - never blow out the dust or inhale it! Also, when cleaning the parts DO NOT use a petroleum based cleaner, use denatured alcohol or brake cleaner only.
Removing Tire and Drum
Use the same procedure you would use to replace a flat tire. Block your front wheels and jack up the car. Use a jack stand - do not allow the jack itself to be the only thing holding the car up! Once you have removed the tire your drum will more than likely have one or two very thin holding nuts, use your flat head screw driver to work them away from the drum far enough to where you can "unscrew" them from the lugs (may want to wear a glove, those things can wear your fingers out!)
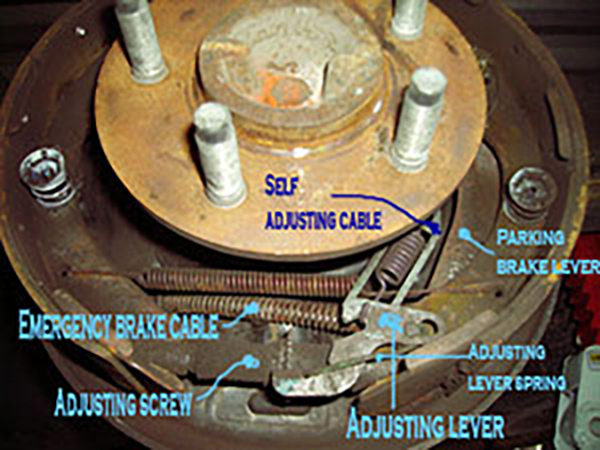
Release your parking brake. The drum more than likely will not be able to be pulled off without releasing reducing the tension the shoes have on it. To do so you will need to remove the rubber grommet from the backing plate, you will be underneath looking behind the drum toward the bottom. The grommet removed will allow you access to the adjusting lever and adjusting screw.
Using a thin flat head screw driver push the adjusting lever away from the adjusting screw and at the same time use a regular flat head screw driver, moving your handle upward, to turn the adjusting screw until the tension has been removed (The adjusting screw is like a gear with the teeth pointing outwards, the screw driver will fit between the teeth).
Removing the Brake Shoes
Once you remove the drum use the spring removal tool and start taking off the springs and self adjuster cable. I suggest laying them out in order as this will help you from getting confused.
Once you have removed all the springs, cables and adjusting screw remove the brake pad holding springs. One brake shoe will have the parking brake lever attached. I suggest attempting to remove the brake shoe from the parking brake lever without disconnecting the parking brake cable - I find it much easier - re-attaching the cable to the lever can be a pain in the #$%@!
You should now have both brake shoes removed from the backing plate. Now it is time to clean up the remaining parts, and as discussed previously - Don't use petroleum products!