
Change Your Motor Oil!
Automobile combustion engines are mechanical devices that have numerous metal parts that come in contact with other metal parts. The resulting friction causes extreme heat and will eventually lead to the demise of the parts concerned. Engine oil, petroleum based or synthetic, creates a film of lubricating substance on the parts which greatly reduces the friction and heat. Follow your car/truck maker's recommendation (usually every 3000 to 5000 miles) to ensure a long life for your vehicle's power plant.
Many garages and oil change venues offer coupons or discounts for oil changes, seek them out and save your wallet, too!
Depending on the vehicle and how much time you have, changing the engine's oil and filter may be one of the easiest tasks the owner can accomplish for themselves, but with the number of relatively inexpensive oil change options there are, you would need to carefully consider the best route.
To change the oil and replace the filter, you would need a few tools, and you would need to find a location in your town that would accept your used oiled and filter for recycling. You cannot just throw the used filter in your trash can, and DO NOT pour the used oil into the storm drain or sewer system. The used oil presents an environmental hazard. Do the right thing, recycle!
Do it Yourself Oil and Filter Change Procedure
Unlike most other tasks you will be doing on your vehicle, you are going to want the engine at normal operating temperature. You see, when the oil is hot, it will drain much better than if it was at room temp. Because the oil will be hot, you must take precautions to ensure it does not come in contact with your skin; trust me, it is a painful experience that you would not want to repeat. So, be careful!
Now, get the vehicle into the best position for the task. Block the wheels and apply the parking brake. Then you want enough room underneath the engine so you can work -- enough room so you can easily access the oil filter and the oil pan's drain plug. You want the vehicle to be as level as possible. I suggest putting the vehicle up on jack stands, but I have seen folks use all sorts of innovative ideas; whatever you do to provide the clearance you need, just be smart about it. You don't want the neighbors asking, "Hey, what happened to Jim?" and the reply be something like, "Oh, he was changing his oil and his car fell on him -- the funeral was closed casket." Yeah, avoid that.
With a lint-free rag, wipe down the area around the oil pan's drain plug. Then place a drain pan under the drain plug. The pan will collect the old, hot, dirty oil during the process of draining. Make sure your drain pan has enough capacity to collect the oil -- if your engine holds five quarts, then a four quart drain pan probably won't get it done without a mess. Make sure your drain pan is big enough, check your owner's manual ahead of time!
Next, with a boxed end wrench or an appropriate sized socket wrench, loosen the drain plug. Once loose, using a rag to protect yourself from the heat, complete the removal of the plug with your hand. While loosening it, push the plug toward the oil pan to try and maintain a good seal with the threads -- this will ensure the oil doesn't start leaking every where. Once you have fully loosened the plug, quickly pull it away and let the oil drain into the drain pan. Try not to let the plug fall into the drain pan -- it is a pain to fish it out. If you have to fish it out and you have one, use one of those extendable magnets used to retrieve nuts and bolts that may have fallen into otherwise unreachable locations; those work well.
Inspect the drain plug and its gasket for any issue that may cause future leaks. If the plug is damaged, replace it.
Once the oil has stopped dripping out of the oil pan, replace the drain plug. Carefully move the drain pan to a location under the oil filter.
Using a filter wrench, loosen the filter. Then in the same manner used to remove the drain plug, remove the oil filter. Keep in mind that the used filter will be heavier than your new one -- it is full of oil and all the dirty stuff that your engine conjured up since your last oil change. Now, empty the oil that is in the filter into the drain pan and place the used filter into a plastic bag until you can take it to a place to be recycled.
With a clean, lint free rag, clean the area around where the filter is mounted. Ensure no debris is present.
Inspect the new oil filter by ensuring that no foreign objects or debris has somehow made its way into the business end of the filter -- if something has, remove it. Put a little new oil on the end of your finger and rub the oil onto the surface of the filter's gasket. Now, while using your hand, place the filter on the filter's mount on the engine and start turning it. Once the filter becomes flush with the mount, tighten no more than one full turn -- do not use a filter wrench to torque your filter -- it only needs to be hand tight; over tightening filter could lead to leaks because you may violate the integrity of the gasket.
Safely put the vehicle back on the ground. Find and remove the oil fill cap and pour the new oil (to your owner's manual specifications) into the engine (there will be a oil fill cap on the top side of your engine -- check your vehicle's owner's manual for the specific location if it is not clearly visible to you). Replace the oil fill cap, and start your engine.
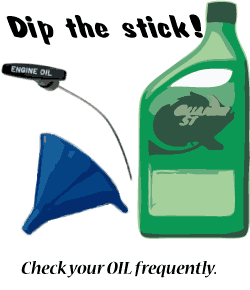
With the engine idling, look around for leaks. Make sure to specifically look to the drain plug and oil filter, but do a complete inspection of the engine. Turn off the engine and let it sit for a few minutes to allow the oil to settle. Then use the oil dip stick to check the oil level. Add oil if needed to bring the level up to the proper level as annotated on the dip stick.
Take your used oil and filter to your local oil recycling location. Some towns and cities have specific locations, and most service stations and auto parts stores have used oil dumps.
The Standard Vender Oil Change
When you take your car in to a vender for an oil change, you should expect the mechanic to drain your vehicles oil, replace the oil filter, inspect and lube the chassis (when applicable). They should refill the oil to the proper level with a conventional or synthetic oil -- they should provide you with a choice. Expect the shop completing your oil change to top off the necessary fluids and check the air filter, breather filter (when applicable), cabin air filter, and tire pressure. They should notify you if issues are discovered or if any adjustments needed.